Rucking Guide: Heart Rate, Calories & Starting Weight
Published: March 23, 2026
At a glance
- Rucking = walking with added weight (weighted vest or backpack)
- Burns 35-50% more calories than regular walking (with typical 20-30 lb load)
- Builds strength, endurance, and bone density with low injury risk
- Start with a loaded backpack (books/dumbbells) before buying equipment
- Begin with 10-15% of your body weight and progress gradually
Consult a healthcare provider before starting any new exercise program, especially if you have pre-existing conditions affecting your back, knees, heart, or joints — this article is for informational purposes only and does not replace professional medical advice.
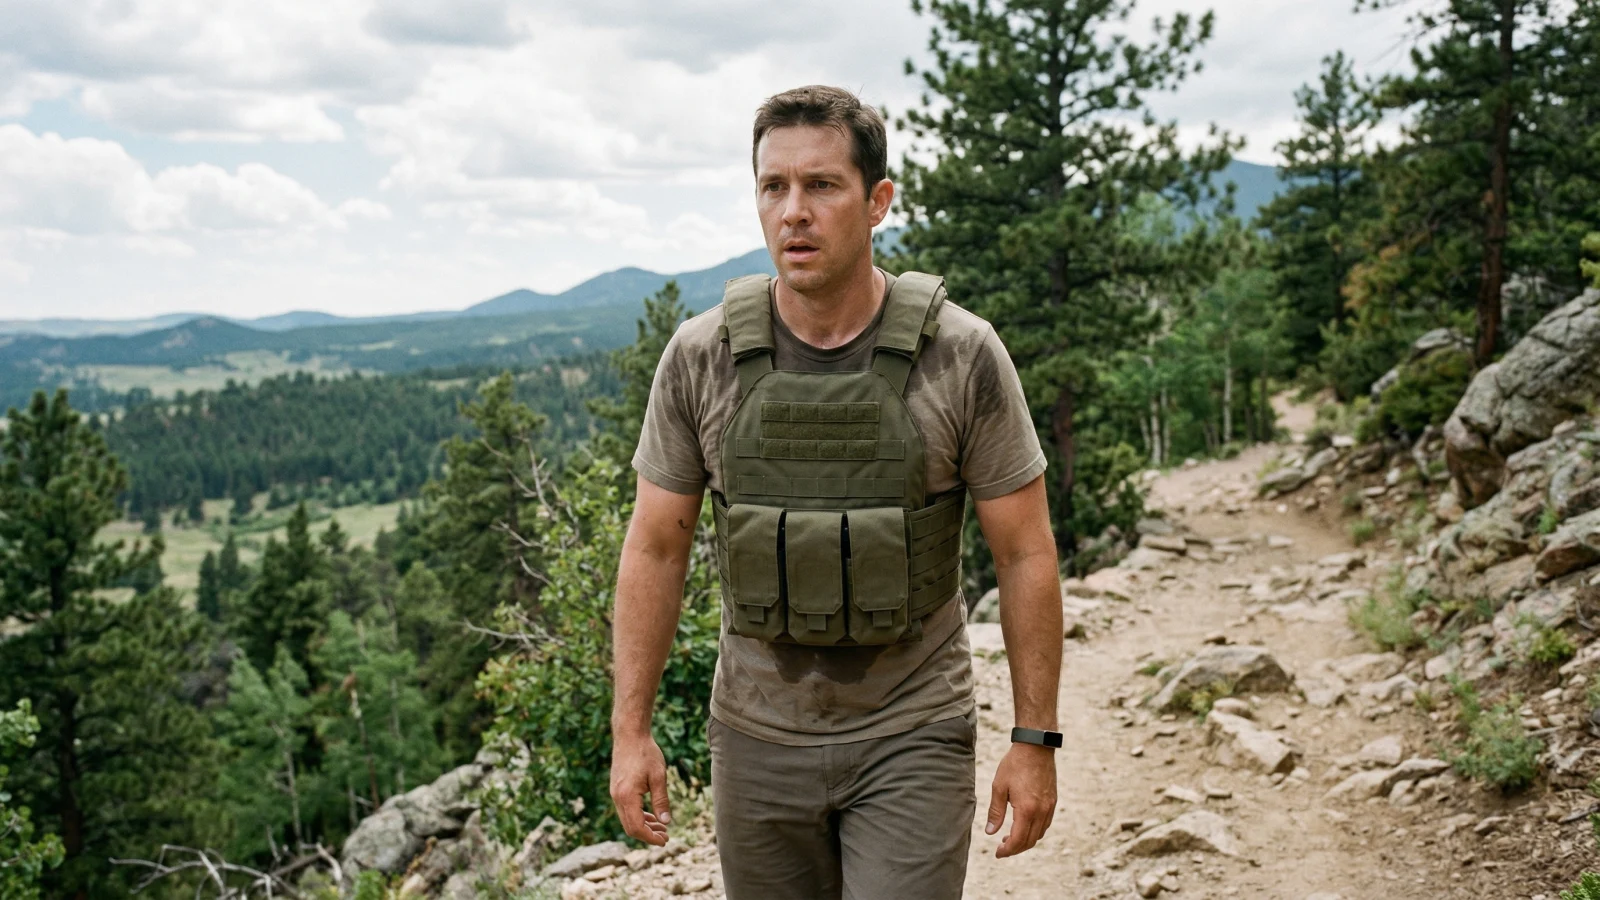
What Is Rucking?
Rucking is the simple act of walking with added weight on your back or torso. The term comes from military training, where soldiers carry rucksacks (backpacks) loaded with gear during long marches.
But rucking isn’t just for the military anymore. It’s become one of the most popular fitness trends in 2026 because it’s:
- Simple: Just walk with weight
- Effective: Burns 35-50% more calories than regular walking (with typical loads)
- Low-impact: Easier on joints than running
- Functional: Builds real-world strength
- Accessible: No gym membership or special equipment needed
You can ruck with a backpack loaded with weight plates, sandbags, or books. Or you can use a weighted vest, which distributes weight more evenly across your torso.
Why Rucking Works
1. Massive Calorie Burn
Rucking significantly increases calorie burn compared to regular walking. The amount depends on how much weight you carry:
Calorie increase by load weight:
- 10-15 lbs: ~15-25% more calories
- 20 lbs: ~25-35% more calories
- 30 lbs: ~35-50% more calories
- 40+ lbs: ~50-65% more calories
Real-world example:
- 180 lb person walking at 3 mph: ~280 calories/hour
- Same person rucking with 30 lbs at 3 mph: ~400 calories/hour
That’s 43% more calories for the same distance and time. Over a 5-mile walk, that’s an extra 200+ calories burned. For weight loss, rucking is one of the most efficient cardio exercises you can do.
Calculate Your Rucking Calories
Use this calculator based on MET (Metabolic Equivalent of Task) values—the same method Free Calorie Track uses:
Rucking Calorie Calculator
11% of body weight
💡 Calories per hour: 384 cal/hr
Note: This calculator uses simplified metabolic equations. Actual calorie burn varies based on terrain, elevation, temperature, fitness level, and individual metabolism.
Note: This calculator uses the same MET-based calculation as Free Calorie Track. Estimates are conservative and scientifically grounded. Actual calorie burn varies based on terrain, elevation, temperature, fitness level, and metabolism. Most fitness trackers (Apple Watch, Fitbit, Garmin) underestimate rucking calories because they don’t detect added weight.
Use our calorie counter to track your rucking calories and see how it impacts your daily calorie balance.
2. Builds Strength & Muscle
Walking with weight is load-bearing exercise, which means your muscles work harder to stabilize and move your body. Rucking primarily targets:
- Legs: Quads, hamstrings, glutes, calves
- Core: Abs, obliques, lower back (to stabilize the load)
- Shoulders & traps: Especially with a weighted vest
- Posterior chain: Entire back side of your body
Unlike traditional cardio (running, cycling), rucking builds muscle while burning fat. Learn more about tracking your macros to optimize muscle preservation during rucking.
3. Bone Density & Joint Health
Weight-bearing exercise is one of the best ways to improve bone density and prevent osteoporosis. Studies show that walking with a weighted vest can significantly increase bone mineral density, especially in the spine and hips.
Rucking is also lower-impact than running. You’re walking, not pounding the pavement, which means less stress on your knees, ankles, and hips. The added weight provides resistance without the joint damage.
4. Cardiovascular Endurance
Rucking elevates your heart rate more than regular walking, giving you a solid cardiovascular workout without the intensity of running. It’s perfect for:
- Building aerobic base
- Improving VO2 max
- Training for endurance events (marathons, obstacle races, hiking trips)
5. Rucking Heart Rate: What to Expect
Rucking typically elevates your heart rate to 50–70% of your max — squarely in Zone 2 cardio territory — which is the ideal range for fat burning and aerobic base building.
Estimated heart rate by pace and load (for a moderately fit adult):
| Load | Pace | Estimated Heart Rate |
|---|---|---|
| No weight | 3 mph | 95–110 bpm |
| 20 lbs | 3 mph | 110–130 bpm |
| 30 lbs | 3 mph | 120–140 bpm |
| 30 lbs | 3.5 mph | 130–150 bpm |
Why Zone 2 matters: At 50–70% of max heart rate, your body preferentially burns fat for fuel. It’s sustainable for long distances, puts minimal stress on joints, and builds the aerobic base that supports all other fitness. Rucking hits this zone naturally — you’re working hard enough to breathe noticeably but can still hold a conversation.
How to find your Zone 2 rucking pace: Use the “talk test” — you should be able to speak in full sentences but wouldn’t want to sing. If you’re gasping, slow down or reduce weight. If it feels like a casual stroll, add weight or increase pace.
A fitness tracker or heart rate monitor gives you exact numbers, but most trackers underestimate rucking intensity because they don’t account for the added load.
6. Mental Toughness
There’s something uniquely challenging about rucking. It’s not as intense as a sprint, but the sustained effort over miles builds mental resilience. Military units use rucking to build grit and mental fortitude—and the same applies to civilians.
7. Low Injury Risk
Compared to high-impact activities like running or CrossFit, rucking has a lower injury rate. As long as you start with appropriate weight and progress gradually, your risk of overuse injuries is minimal.
Weighted Vest vs. Rucking Backpack: Which Is Better?
Both weighted vests and rucking backpacks work, but they have different advantages—including different calorie burn rates.
| Feature | Weighted Vest | Rucking Backpack |
|---|---|---|
| Weight distribution | Even across torso (front & back) | Concentrated on back |
| Calorie burn | +35-50% vs no weight (typical load) | +7% more than vest |
| Stability | Very stable, doesn’t bounce | Can shift if not packed well |
| Comfort | More comfortable for long distances | Can cause shoulder/back strain |
| Versatility | Great for pull-ups, push-ups, bodyweight exercises | Primarily for walking/hiking |
| Visibility | Low-profile, fits under jackets | More visible, bulkier |
| Adjustability | Fixed weight (unless using plate-loaded vest) | Easy to add/remove items |
| Price | $50-$300 | $50-$400 |
Why Backpacks Burn More Calories
Carrying weight on your back (vs. distributed front and back on a vest) is approximately 7% harder metabolically. Your body works harder to stabilize the load, which increases calorie burn.
My Personal Preference
I personally prefer weighted vests because I find them more comfortable and sustainable for long-term training. The even weight distribution doesn’t strain my shoulders or back the way backpacks do, and I can wear them for bodyweight exercises like pull-ups and push-ups. However, backpacks are great for carrying gear (water, snacks, layers) and are more adjustable.
My recommendation: If you want to do more than just walk (pull-ups, push-ups, burpees), get a weighted vest. If you’re purely rucking long distances and want to carry gear, a rucking backpack might be better.
Check out my ZELUS weighted vest review for a specific product recommendation.
How to Get Started with Rucking
Start with What You Have: The Backpack Method
Before buying any equipment, I recommend starting with a comfortable backpack you already own. Load it with:
- Books (paperbacks or textbooks)
- Dumbbells wrapped in towels
- Water bottles
- Heavy household items
Why start this way?
- Zero cost - See if you actually like rucking before investing
- Ease into it - Start with 5-10 lbs and gradually add weight
- Find your target weight - Discover what weight feels right for you
- Then buy once - Purchase a vest at your target weight (no need to buy multiple)
Ruck with your loaded backpack for 2-4 weeks. If you love it and want to progress, then invest in a proper weighted vest.
Step 1: Choose Your Weight
Beginner: Start with 10-15% of your body weight
- 150 lb person → 15-22 lbs
- 180 lb person → 18-27 lbs
- 200 lb person → 20-30 lbs
Intermediate: Progress to 20% of body weight over 2-3 months
- This is an excellent long-term target for most people
- Provides significant calorie burn and strength benefits
- Sustainable for regular training
Advanced: Experienced ruckers can progress to 25-30% of body weight
- Takes 6-12 months of consistent training to reach safely
- Some military rucks use 50+ lbs, but this is for specialized training and not necessary for fitness goals
Step 2: Start Short
Don’t jump into a 10-mile ruck on day one. Start with:
- Week 1-2: 1-2 miles, 2-3 times per week
- Week 3-4: 2-3 miles, 3 times per week
- Week 5+: Gradually increase distance or weight (not both at once)
Step 3: Focus on Form
Good rucking form:
- Posture: Stand tall, shoulders back, core engaged
- Stride: Natural walking stride (don’t overstride)
- Foot strike: Heel-to-toe roll, not pounding
- Breathing: Steady, rhythmic breathing
- Arms: Natural swing, don’t force it
Step 4: Listen to Your Body
Common issues:
- Shoulder pain: Tighten straps or reduce weight
- Lower back pain: Strengthen your core, check form
- Knee pain: Reduce weight, check your shoes
- Blisters: Wear proper socks, break in your boots
If pain persists, stop and consult a professional.
Bodyweight Exercises with a Weighted Vest
One of the best things about a weighted vest is that you can use it for more than just rucking. Adding weight to bodyweight exercises dramatically increases difficulty and muscle activation.
1. Weighted Pull-Ups
Pull-ups are already one of the best upper body exercises. Add a weighted vest and they become even more effective for building:
- Lats (back width)
- Biceps
- Forearms
- Core stability
How to do it:
- Wear your weighted vest
- Perform pull-ups with strict form (full range of motion)
- Start with fewer reps than your unweighted max
- Progress slowly (add 1-2 reps per week)
For optimal muscle growth, track your protein intake to ensure you’re getting 0.8-1g per pound of body weight.
2. Weighted Push-Ups
Push-ups with a weighted vest turn a bodyweight staple into a serious chest and tricep builder.
Benefits:
- Builds explosive pressing power
- Increases chest and tricep hypertrophy
- Improves shoulder stability
- Transfers to bench press strength
How to do it:
- Wear your vest
- Perform push-ups with full range of motion (chest to floor)
- Keep core tight, don’t let hips sag
- Start with 3 sets of 8-10 reps
3. Weighted Squats & Lunges
Adding a vest to squats and lunges increases leg strength without the spinal loading of a barbell.
Advantages over barbell:
- No need for a squat rack
- Weight distributed on torso (less spinal compression)
- Can do anywhere (home, park, gym)
4. Weighted Burpees & Cardio Circuits
Want to make burpees even more brutal? Add a vest.
Sample weighted vest circuit:
- 10 push-ups
- 10 squats
- 10 burpees
- Rest 1 minute
- Repeat 5 rounds
This type of training combines strength and conditioning in a single workout.
How to Track Rucking in Free Calorie Track
If you’re tracking your nutrition and want to accurately log the calories burned from rucking, Free Calorie Track makes it easy.
How to Log Weighted Exercises
- Open Free Calorie Track
- Tap “Log Exercise”
- Search for your exercise (walking, pull-ups, push-ups, squats, etc.)
- Check the “Add Weighted Load” box
- Select load type (Vest or Backpack for walking exercises)
- Choose weight carried (10-15 lbs, 20 lbs, 30 lbs, or 40+ lbs)
- Enter duration or reps
- App automatically calculates calories with weighted load bonus
Weighted load options available for:
- Walking exercises (vest or backpack)
- Pull-ups and chin-ups (vest)
- Push-ups (vest)
- Squats and lunges (vest)
- Burpees and other bodyweight exercises (vest)
Why track rucking calories?
If you’re trying to lose weight, gain muscle, or maintain your weight, tracking both your food intake and exercise output gives you the full picture of your calorie balance. Rucking can burn 300-450 calories per hour, which significantly impacts your daily calorie budget.
Use Free Calorie Track to:
- See your net calories (food eaten - TDEE - exercise burned)
- Ensure you’re in a deficit for fat loss
- Make sure you’re eating enough for muscle gain
- Track macro intake (protein, carbs, fat) alongside exercise
👉 Try Free Calorie Track — 100% free, no ads, works offline
Sample Rucking Programs
Beginner: 4-Week Rucking Program
Goal: Build base fitness and adapt to weighted walking
Starting weight: 10-15% of your body weight (e.g., 18-27 lbs for a 180 lb person)
| Week | Distance | Weight (% of body weight) | Frequency |
|---|---|---|---|
| 1 | 1-2 miles | 10-12% | 2x per week |
| 2 | 2 miles | 12-15% | 3x per week |
| 3 | 2-3 miles | 12-15% | 3x per week |
| 4 | 3 miles | 15% | 3x per week |
Use the calculator above to find your specific weight based on your body weight.
Intermediate: Fat Loss Rucking Program
Goal: Maximum calorie burn for weight loss
⚠️ Note: This program assumes you’ve completed a beginner program and have built a base level of fitness. Do not attempt without proper buildup training.
Target weight: 15-20% of your body weight (e.g., 27-36 lbs for a 180 lb person)
| Day | Distance | Weight (% of body weight) | Pace/Notes |
|---|---|---|---|
| Monday | 4 miles | 15-18% | Moderate pace (3 mph) |
| Wednesday | 2 miles | 18-20% | Brisk pace (3.5 mph) |
| Friday | 5 miles | 15% | Easy pace (2.5 mph) |
| Saturday | Circuit | 15% | Weighted vest exercises (push-ups, pull-ups, squats) |
Use the calculator above to find your specific weight based on your body weight.
Advanced: Strength & Endurance Program
Goal: Build serious conditioning
⚠️ Note: This program is for experienced ruckers only. Requires months of progressive training. Do not attempt without proper buildup.
Target weight: 20-25% of your body weight for standard rucks, up to 30% for heavy carries (e.g., 36-54 lbs for a 180 lb person)
| Day | Distance | Weight (% of body weight) | Terrain/Notes |
|---|---|---|---|
| Monday | 6 miles | 20-25% | Flat terrain |
| Tuesday | Circuit | 20-25% | Weighted calisthenics (pull-ups, push-ups, lunges) |
| Thursday | 4 miles | 25-30% | Hilly terrain |
| Saturday | 8-10 miles | 18-20% | Long ruck |
Use the calculator above to find your specific weight based on your body weight. Once comfortable at 20-25% body weight, experienced ruckers can progress to 30% or more for specialized training.
Rucking Safety Tips
1. Start Light and Progress Slowly
The biggest mistake beginners make is loading too much weight too soon. Start with 10-15% of your body weight and add 5 lbs every 2-3 weeks.
2. Wear Proper Footwear
Running shoes aren’t ideal for rucking. You need shoes with:
- Good arch support
- Sturdy sole (not too cushioned)
- Ankle support (for heavy loads)
Hiking boots or trail running shoes work best.
3. Check Your Form
Film yourself rucking and check for:
- Forward lean (bad)
- Hunched shoulders (bad)
- Short, choppy strides (bad)
- Tall posture, natural stride (good)
4. Hydrate
Rucking makes you sweat more than regular walking. Bring water, especially on rucks longer than 30 minutes.
5. Warm Up and Cool Down
Before rucking:
- 5-10 minutes of light walking
- Dynamic stretches (leg swings, arm circles)
After rucking:
- 5 minutes of easy walking
- Static stretches (hamstrings, quads, hip flexors)
6. Listen to Your Body
Pain is not normal. If you experience:
- Sharp pain in joints
- Numbness or tingling
- Severe muscle soreness lasting 3+ days
Stop and rest. If pain persists, see a healthcare provider.
- Acute back, knee, or ankle injuries
- Severe osteoporosis or bone conditions
- Pregnancy (consult your doctor first)
- Heart conditions without medical clearance
- Recent surgery (wait for full recovery)
Frequently Asked Questions
What heart rate should I target while rucking?
Aim for 50–70% of your max heart rate (roughly 220 minus your age). For a 35-year-old, that’s ~92–129 bpm. This Zone 2 range maximizes fat burning and is sustainable for long distances. If you’re consistently above 140 bpm, reduce weight or slow your pace.
How much weight should I ruck with as a beginner?
Start with 10–15% of your body weight — about 15–22 lbs for a 150 lb person, 18–27 lbs for 180 lbs. This is challenging enough to elevate calorie burn meaningfully without risking injury. Add 5 lbs every 2–3 weeks once the current weight feels comfortable.
Is rucking better than running for weight loss?
Both are effective, but rucking may be better for most people because:
- Lower injury risk (walking vs. high-impact running)
- Builds muscle while burning fat (running mostly burns fat)
- Easier to sustain long-term (less joint wear and tear)
However, running burns slightly more calories per hour at higher intensities.
Can I ruck every day?
You can, but most people should ruck 3-5 times per week with rest days. Daily rucking can lead to overuse injuries, especially if you’re carrying heavy weight.
Should I ruck fast or slow?
Start slow (2.5-3 mph) to build endurance. As you adapt, you can increase pace to 3.5-4 mph for higher calorie burn. Going too fast with heavy weight increases injury risk.
Can I ruck on a treadmill?
Yes, but it’s not ideal. Treadmills don’t replicate the stability and balance demands of outdoor terrain. If you do ruck on a treadmill, add incline (5-10%) to simulate hills.
How much weight should I use for pull-ups?
Start with 5-10% of your body weight and progress slowly. If you normally do 10 unweighted pull-ups, expect to do 5-7 reps with a 10 lb vest.
Can I wear a weighted vest all day?
Not recommended. Wearing a weighted vest for extended periods (8+ hours) can cause:
- Muscle fatigue
- Joint stress
- Postural issues
- Cardiovascular strain
Limit weighted vest use to exercise sessions only (1-2 hours max).
Equipment Recommendations
Best Weighted Vest for Rucking
Looking for a specific product recommendation? Read my full ZELUS weighted vest review for an in-depth look at the vest I use for rucking, pull-ups, and push-ups.
Why I like the ZELUS:
- Comfortable for long distances
- Low-profile design (fits under jackets)
- Budget-friendly ($50-90)
- Available in 6-30 lb options
Alternative: Start with a Backpack
Don’t want to invest yet? Use a regular backpack loaded with:
- Books
- Dumbbells wrapped in towels
- Water bottles
- Heavy household items
This lets you test rucking for 2-4 weeks before committing to equipment.
Final Thoughts
Rucking is one of the most underrated forms of exercise. It’s simple, effective, scalable, and you can do it anywhere. Whether you’re trying to lose weight, build endurance, or just add variety to your training, rucking delivers results.
Start simple:
- Load a backpack with 10-20 lbs (books/dumbbells)
- Walk 1-2 miles, 2-3x per week
- Gradually increase distance or weight
- Track your calories in Free Calorie Track
- Stay consistent
In 4-6 weeks, you’ll notice:
- Increased calorie burn and fat loss
- Stronger legs and core
- Better cardiovascular endurance
- Improved mental toughness
Give rucking a try. Your body (and your calorie tracker) will thank you.
Related Articles
ZELUS Weighted Vest Review
My honest review of the ZELUS vest after months of use
What Are Calories?
Learn the basics of calorie tracking and energy balance
Calculate Your TDEE
Find your daily calorie burn to optimize rucking results
Free Calorie Counter
Track calories and exercise with our free calorie tracker
Sources: