How to Count Calories: Complete Beginner's Guide (2026)
Published: March 2, 2026
At a glance
- Calorie counting is the most evidence-backed method for weight management
- You need: a food scale, a tracking app, and basic knowledge of nutrition labels
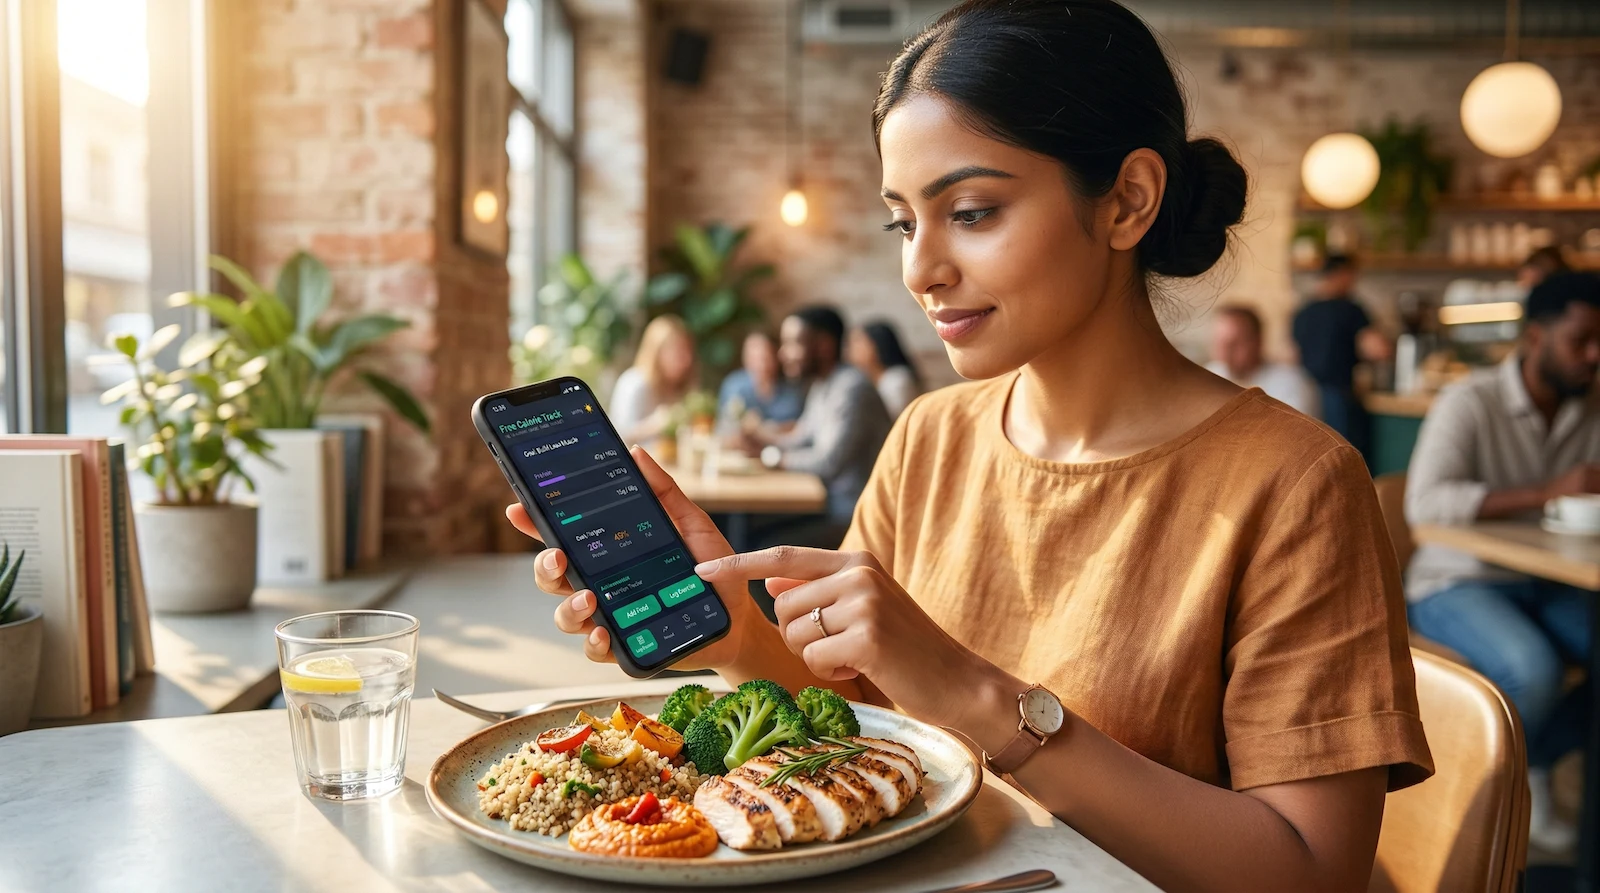
- For restaurant meals and home cooking, AI food logging gives you an instant estimate — no barcode required
- Start by tracking everything you eat for 1 week without changing habits
- Accuracy matters more than perfection — consistent tracking beats occasional precision
If you’ve ever felt overwhelmed by the idea of counting calories, you’re not alone. But calorie counting is the most straightforward, science-backed method for managing your weight — and it’s simpler than you think once you understand the basics.
Why Count Calories?
Weight management comes down to one thing: energy balance.
- Eat more calories than you burn = Weight gain
- Eat fewer calories than you burn = Weight loss
- Eat the same as you burn = Weight maintenance
Calorie counting removes the guesswork. Instead of wondering why the scale isn’t moving, you’ll have data showing exactly what’s happening.
Why it works:
- Awareness — Most people underestimate their intake by 30–50%
- Flexibility — No food is off-limits if it fits your calories
- Education — You’ll learn which foods are calorie-dense vs. filling
- Accountability — Tracking creates a record of your choices
- Results — Studies consistently show calorie counting works for weight loss
What You Need to Get Started
1. A Food Scale (Essential)
Why it matters: Eyeballing portions is notoriously inaccurate. A food scale removes the guesswork.
What to buy: Any digital kitchen scale that weighs in grams and ounces
- Look for: Tare function (zero out the container weight)
- Recommended: Crownful Digital Food Scale (~$15)
- Where it lives: Keep it on your kitchen counter for easy access
When to use it: Weigh everything that doesn’t come pre-portioned (especially calorie-dense foods like nuts, oils, cheese, meat)
👉 Read our complete guide to using a food scale
2. A Calorie Tracking App (Essential)
Modern tracking apps have three ways to log food — and knowing when to use each one is what makes tracking fast:
- Barcode scanner — fastest for packaged foods. Scan, confirm, done.
- Food database search — best for whole foods (chicken breast, banana, oats)
- AI food logging — the biggest recent change. Take a photo of your meal or describe it in plain English and the AI estimates the calories and macros. Adding a note to your photo (“large portion, used extra dressing”) meaningfully improves accuracy. Genuinely useful for restaurant meals, home cooking, and anything without a label.
Features you need:
- ✅ Barcode scanner for packaged foods
- ✅ 220,000+ food database for common foods
- ✅ AI food logging for meals you can’t scan
- ✅ Ability to save custom meals and recipes
- ✅ Macro tracking (protein, carbs, fat)
Why Free Calorie Track?
- 100% free forever, no premium paywall
- All three logging methods built-in: barcode, search, and AI
- Works offline
- No account required
3. Measuring Cups & Spoons (Optional but Helpful)
For liquids and specific ingredients where weight isn’t practical (though weighing is still more accurate for most things).
How to Count Calories: Step-by-Step
Step 1: Calculate Your Calorie Target
Before tracking, you need to know your goal. Free Calorie Track automatically calculates your TDEE (Total Daily Energy Expenditure) based on your age, sex, height, weight, and activity level — then recommends calorie targets based on your goal.
For weight loss: A 300–500 calorie deficit from your TDEE For muscle gain: A 200–300 calorie surplus For maintenance: Eat at your TDEE
The built-in calculator handles all the math and adjusts as you update your stats.
Step 2: Track Everything for 1 Week (Baseline Week)
Don’t change your eating habits yet. Just track everything you normally eat for 7 days.
Why? This shows you:
- Your current average intake
- Where most of your calories come from
- Your eating patterns and habits
How to track:
- Weigh/measure food BEFORE cooking when possible (raw meat weighs more than cooked)
- Important: Match your tracking method — if you weigh raw, log “raw” entries; if you weigh cooked, log “cooked” entries. Don’t mix them or you’ll undercount significantly.
- Log food immediately after eating (don’t wait until end of day)
- Include everything: cooking oils, condiments, “just a bite” samples
- Track drinks (alcohol, juice, soda, coffee creamer)
For meals you can’t easily look up: Use AI logging. Take a photo of your plate, or describe what you ate — “grilled chicken thigh with roasted sweet potato and a side salad with olive oil.” The AI returns an estimate broken down by food. Adding a note to your photo (“large portion,” “heavy on the oil”) pushes accuracy closer to reality. It won’t be as precise as weighing, but it’s far better than skipping the log entirely.
Step 3: Read Nutrition Labels
Every packaged food has a Nutrition Facts label. Here’s how to read it for calorie counting:
The serving size — Listed at the top. Pay attention to “servings per container”
- Example: A bag of chips might say “150 calories per serving” but contain 2.5 servings
- Total calories in bag = 150 × 2.5 = 375 calories
Calories per serving — The big number you track
Macronutrients — Protein, carbs, fat (optional but helpful to track)
Common tricks to watch for:
- Unrealistically small serving sizes (who eats exactly 15 chips?)
- “Low calorie” claims for tiny portions
- Multiple servings in what looks like a single-serving package
Step 4: Weigh Your Food
For solid foods:
- Place container/plate on scale
- Press “tare” or “zero” to reset to 0
- Add food
- Note the weight in grams
- Log it in your app
Example:
- Nutrition label says: “1 serving (40g) = 180 calories”
- You weigh: 65g
- Calculation: (65g ÷ 40g) × 180 cal = 293 calories
Pro tip: Weigh in grams, not ounces. Grams are more precise and easier for calculations.
Step 5: Track Homemade Meals
Method 1: Recipe Builder (Best for meals you make often)
- Weigh every ingredient as you cook
- Create the recipe in your app once
- Weigh the total cooked weight
- Log your portion each time you eat it
Method 2: Quick Add (For one-time meals)
- Weigh each ingredient separately
- Log each component individually
- Add them all to the same meal
Method 3: AI Logging (For anything you didn’t weigh)
If you cooked without weighing, or ate something you didn’t prepare, take a photo or describe it. “Two scrambled eggs cooked in butter with a slice of sourdough toast and a handful of blueberries.” The AI breaks it down by item and returns calorie and macro estimates.
One underused trick: photograph the recipe or ingredient list before you cook. A photo of the recipe card or the open cookbook page gives the AI exact ingredient quantities to work with — which makes the estimate significantly more accurate than describing a finished plate from memory. Not perfect, but often surprisingly close.
Example recipe for Method 1: Chicken stir-fry
- 200g chicken breast (raw weight)
- 150g broccoli
- 100g bell peppers
- 15ml olive oil
- Soy sauce (negligible calories)
Log each item, save as “Chicken Stir-Fry,” note total weight. Next time, just weigh your portion and log it as a fraction of the recipe.
Foods That Are Easy vs. Hard to Track
Easy to Track
- Packaged foods with barcodes — Scan and log in seconds
- Whole foods — Apple, banana, plain chicken breast, rice
- Restaurant chains — Most publish nutrition info; log it directly or scan their items
- Foods with standard portions — 1 large egg, 1 slice bread
Harder to Track (But Still Doable)
This is where most people give up — or just skip the log. AI food logging changes the calculus here significantly.
- Restaurant meals at local spots — Previously: guess and add 20%. Now: photograph your plate and add a note (“large portion, came with extra sauce”) or just describe the dish. “Pad Thai with shrimp, medium portion” gets you a reasonable breakdown immediately.
- Mixed dishes without recipes — Casseroles, stews, dishes at dinner parties. If you can photograph the dish before serving, do it — the AI can estimate from the visual. Add a note about any ingredients that aren’t obvious from looking at it.
- Foods cooked by others — Same approach. Photograph the plate. If you know anything about how it was prepared, add it as a note — “cooked in a lot of butter,” “very saucy” — it matters.
- “A handful” of calorie-dense foods — Nuts, granola, dried fruit. Weigh these whenever possible. AI estimation of loose snacks is the weakest use case; a scale is still better.
When in doubt: Use AI logging to get a working estimate rather than skipping. An imperfect log is far more useful than a gap.
Common Mistakes to Avoid
1. Not Weighing Calorie-Dense Foods
The problem: “Eyeballing” peanut butter, cheese, nuts, oils, etc. leads to massive underestimation.
Example:
- You think: 1 tablespoon peanut butter (95 cal)
- You actually eat: 2+ tablespoons (200+ cal)
- Weekly error: 735+ calories (could prevent 0.2 lbs weight loss)
Solution: Weigh everything calorie-dense. It takes 10 seconds. This is where AI logging is weakest — don’t rely on it for high-calorie items you can easily weigh.
2. Forgetting Cooking Oils and Condiments
A tablespoon of olive oil is 120 calories. That “light” salad dressing? 100 calories per serving. These add up fast.
Solution: Measure cooking oils with a measuring spoon or weigh them. When using AI logging for a cooked meal, always mention the cooking fat — “sautéed in olive oil” changes the estimate meaningfully.
3. Not Tracking on Weekends
Many people are strict Monday–Friday, then stop tracking on weekends. This can wipe out your entire weekly deficit.
The math:
- Monday–Friday: 500 cal deficit = 2,500 cal deficit
- Saturday–Sunday: 1,000 cal surplus = 2,000 cal surplus
- Weekly total: Only 500 cal deficit (0.14 lbs lost instead of 0.7 lbs)
Solution: Track 7 days a week. On days when you’re eating out or eating foods you didn’t prepare, AI logging removes the excuse not to track — you don’t need a barcode or a recipe.
4. Using Volume Instead of Weight
“1 cup of oats” varies wildly depending on how compacted they are. Weighing is always more accurate.
Solution: Use grams for everything except liquids.
5. Not Adjusting for Cooked vs. Raw
Food weight changes significantly when cooked:
- Meat loses water (100g raw chicken ≠ 100g cooked chicken)
- Pasta/rice absorbs water (100g dry pasta = ~240g cooked)
Solution: Log raw weights when possible. If you must weigh cooked, search for “cooked” in your app (e.g., “chicken breast cooked”). When using AI logging, specify “raw” or “cooked” in your description for better accuracy.
6. Trusting Restaurant “Healthy” Claims
A restaurant salad can easily have 800–1,200 calories once you factor in dressing, cheese, nuts, and grilled chicken cooked in oil.
Solution: Look up nutrition info when available. If the restaurant doesn’t publish it, AI logging with a detailed description — including the dressing and toppings — will get you closer than assuming “it’s a salad, so it’s fine.”
Tips for Success
1. Meal Prep Makes Tracking Easy
Cook 3–4 recipes on Sunday. Weigh and divide into containers. Log once, eat all week.
Example meal prep:
- Breakfast: Overnight oats (pre-portioned)
- Lunch: Chicken, rice, vegetables (weighed and logged once)
- Dinner: Rotate between 2–3 pre-logged recipes
- Snacks: Pre-portioned nuts, fruit, yogurt
2. Create a “Favorites” List
Most people eat the same 20–30 foods regularly. Save these in your app so you’re not searching every time.
3. Use AI Logging for Anything Without a Barcode
The barcode scanner handles packaged food. The food database handles simple whole foods. AI logging handles everything else — restaurant meals, home-cooked dishes, food from other people’s kitchens.
The workflow: if you can scan it, scan it. If it’s in the database, search it. For everything else, describe it. Having all three methods available means there’s almost no meal you can’t log in under a minute.
4. Front-Load Your Calories
If you’re always hungry at night, eat a bigger breakfast and lunch. Save 300–400 calories for an evening snack you can look forward to.
5. Don’t Aim for Perfection
Tracking 80–90% accurately is infinitely better than not tracking at all. AI logging exists precisely for this — when you can’t be precise, an estimate keeps your log intact and your streak alive.
6. Pre-Log Your Day
Plan your meals in the morning and log them ahead of time. This removes decision fatigue and keeps you accountable.
How Long Does Calorie Counting Take?
Week 1–2: 10–15 minutes per day (learning curve)
After 1 month: 3–5 minutes per day
Why it gets faster:
- You memorize common foods
- Your favorite meals are saved
- Barcode scanning is instant
- AI logging handles restaurant meals in seconds instead of minutes of research
- You develop a routine
Time-saving by method:
- Barcode scan: ~5 seconds per item
- Database search: ~15–30 seconds per item
- AI logging for a full meal: ~30–60 seconds, regardless of complexity
What About Eating Out?
Option 1: Look it up — Most chain restaurants publish nutrition info; search by name in the app
Option 2: Build it yourself — Log individual components
- Example: Burger = bun (200) + patty (300) + cheese (100) + sauce (50) + fries (400) = 1,050 cal
Option 3: Use AI logging — Photograph your plate or describe the meal. “Chicken tikka masala with basmati rice, medium restaurant portion” returns a calorie and macro estimate in seconds. A photo plus a short annotation (“large portion, extra naan on the side”) is more accurate than a description alone — the AI can see the plate and use your note to calibrate. The more context you provide, the better the estimate.
Option 4: Estimate conservatively — Add 20% to any estimate to account for cooking oils and hidden ingredients restaurants don’t disclose.
Pro tip: Eating out 1–2 times per week won’t derail your progress if you’re tracking the other 5–6 days. The goal isn’t to be perfect at restaurants — it’s to have a reasonable log entry rather than a gap.
Do You Have to Count Calories Forever?
Short answer: No, but it teaches you what proper portions look like.
Many people count calories for 3–6 months, then transition to “intuitive eating” with the knowledge they’ve gained. Others prefer to continue tracking because it takes minimal time and removes the guesswork.
After a few months of tracking, you’ll know:
- What 500 calories of chicken looks like
- How calorie-dense nuts and oils are
- Which foods keep you full vs. which don’t
- Your personal portion sizes
At that point, you can choose to continue tracking or rely on the habits you’ve built.
Common Questions
”Isn’t calorie counting obsessive?”
It can be, but it doesn’t have to be. Tracking is just data collection. If you find yourself anxious, restricting too much, or thinking about food constantly, take a break and consider working with a dietitian.
For most people, tracking provides freedom — you know exactly where you stand, so there’s no guilt or guessing.
”What if I go over my calories one day?”
It’s fine. Weight loss happens over weeks and months, not single days. If you go 500 calories over one day, it might slow your progress by 1–2 days. Just get back on track the next day.
”Do I have to hit my calorie target exactly?”
No. Aim for a weekly average. If your goal is 2,000 calories/day (14,000/week), you could eat:
- 1,800 Mon–Fri (9,000)
- 2,500 Sat–Sun (5,000)
- Total: 14,000 (perfect weekly average)
“What about macros — do I need to track protein, carbs, and fat?”
Calories determine weight loss, but macros affect satiety and muscle preservation:
- Protein: 0.7–1g per lb body weight (preserves muscle, keeps you full)
- Fat: 0.3–0.5g per lb body weight (hormone production, satiety)
- Carbs: Fill the rest (energy, performance)
Tracking macros is optional but helpful. At minimum, track protein.
”How accurate is AI food logging?”
It depends on what you give it. A photo of your plate with a short annotation (“double portion, heavy dressing”) is more accurate than a text description alone — the AI can see the food and use your note to calibrate portion size and preparation. The most accurate use case is photographing a recipe or ingredient list before you cook: the AI has exact quantities and can calculate precisely, often getting very close to what you’d get from logging every ingredient individually.
For restaurant meals or finished dishes you didn’t weigh, expect to be within 10–20% of the actual count — comparable to a careful visual estimate, but without the systematic bias toward underestimating.
Use it as your default for anything you can’t scan or weigh. Treat the result as a reasonable working estimate and move on.
Your 7-Day Action Plan
Day 1–2: Setup
- Buy a food scale (or order one)
- Download Free Calorie Track
- Calculate your calorie target in the app
Day 3–9: Baseline Week
- Track everything you normally eat
- Use barcode scanner for packaged food, search for whole foods, AI logging for restaurant meals or anything without a label
- Don’t try to change habits yet — just get comfortable logging everything
Day 10: Analyze
- Review your baseline week
- Identify high-calorie foods you can reduce
- Plan your first week at your calorie target
Day 11+: Execute
- Eat at your target calories
- Weigh yourself weekly (same day, same time)
- Adjust based on results
Start Tracking with Free Calorie Track
Free Calorie Track makes calorie counting simple:
- ✅ Barcode scanner — instant logging for any packaged food
- ✅ 220,000+ food database — search whole foods and restaurant items
- ✅ AI food logging — describe any meal and get an instant calorie estimate
- ✅ Custom meals and recipes you can save and reuse
- ✅ Macro tracking for protein, carbs, and fat
- ✅ 100% free forever, no premium tier
Related Articles
How to Use a Food Scale
Master the most important tool for calorie counting
Free TDEE Calculator
Find your maintenance calories before setting a deficit
Calorie Deficit Calculator
Calculate exactly how many calories to cut for weight loss
High Fiber Foods
Foods that keep you full on fewer calories